The process – Aftertaste

Now, swallow. Pay attention to how the liquid feels going down. Does it tingle? Does it give a warm feeling or a shiver? Is there any aftertaste?

Wait several minutes and be mindful of how the taste fades. Does it change flavor as it dissipates? Do you feel any pleasant or unpleasant sensations or tastes left behind on your tongue?

One more step, take another small sip of the liquid holding it in your mouth again. Slightly open your lips and breathe in over the liquid. This may enhance the taste and smell you encountered and provide more dimension to your tasting. Be wary however of trying this with very high proof alcohol as the burn from the alcohol content may completely overwhelm your other senses and ruin the tasting experience.

Swallow this second sip and exhale through your nose. Allow the vapors warmed by your mouth to reach your nasal passages, this is the retronasal smell.

Until next time, may all your drinks be tasty. Cheers.

The process – Taste

This is the moment you’ve been waiting for; tip up the glass and let a small amount enter your mouth. Don’t just toss it back or try to take a mouthful; just enough to coat the tongue and roll around your mouth.

Focus first on the feel of the liquid. Allow it to sit on your tongue, Roll it from the front to the back of the tongue paying attention to the sensations you receive. Let it coat the sides of your mouth. How does it feel against your cheeks? Does it linger on the tongue or roll off?

Moving the liquid around your mouth is very important. Some debate the value of moving liquids around the mouth. For years the common belief was that there were specific locations where flavors were sensed: sweetness at the tip of the tongue; sourness at the sides of the tongue and in the cheeks etc. Recent studies indicate that your sensorium will identify flavors all across the tongue and mouth. I know that I am able to taste sour on the tip of my tongue as well as the sides and back. The flavor does not just disappear as the liquid moves through the ‘unmapped’ regions of the tongue. Try it for yourself, get an eyedropper and put different flavors on varied parts of your tongue. You may have more intense sensation in different locales but you should be able to taste the flavor across the entire surface. If for no other reason, roll the liquid around your mouth to provide the greatest exposure to your taste buds possible. As the liquid encounters fresh areas of the mouth you will draw further insight to the flavor than from those taste centers that are already overwhelmed by the flavor.

Do not rush. Hold the liquid in your mouth for at least 15 to 20 seconds to allow its flavor to properly reveal itself. Bitterness for example takes longer to become noticeable than sweetness.

Is the liquid silky or gritty, warm or cold? How does its temperature affect your enjoyment and appreciation of the flavor?

Next focus on the taste itself, does it compare to anything else? The similarity can come in handy later when determining what to mix it with. Don’t worry about categorizing flavors as anything but themselves; for example, pineapple only tastes like pineapple. It may, however, remind you of something else or make you yearn for another flavor, remember this. Focus on the flavor traits and impressions.

When examining the traits of the liquid, is it sweet, sour, bitter? Is there more than one flavor present? Characterize the flavors separately and as a melding. For that matter, do the flavors blend or do they remain distinct.

As you can see, the taste portion is very complex having many things to think about and codify. Take your time, focus on your sensations. You may need to taste the same liquid half a dozen times to work through all your sensations.

Take a break while tasting, this is not a race. Come back to the tasting phase and examine more samples of the same liquid. Each time you should be able to discern nuances that may have been missed on the initial tastes.

No technique is perfect for everyone; the most important properties for becoming a good taster are desire, and the ability to focus on the task at hand to the exclusion of all other input.

Until next time, may all your drinks be tasty. Cheers.

The process – Smell

Swirl the liquid again and lower your nose over the glass. Inhale slowly and deeply. Smell again from deeper within the glass to fully embrace the scent.

Two ways exist for the scent of the liquid to reach your olfactory cells. The first, inhaling or sniffing, is called Orthonasal olfaction and directly draws the scent into your nose. The second method, Retronasal olfaction is the release of odors within the mouth during drinking and will be accomplished during the Aftertaste step. These two approaches are very different. For example the unpleasant smell of certain cheeses becomes very pleasant when retronasally smelled. Medical tests show that the processing of these types of smell input is very different.

Now swirl the liquid and pay attention to the scents released as it moves. Is it flowery, pungent? What can you compare the smell to for reference?

What is the aroma of the liquid? Does it smell of fruits, flowers, vegetables, grains, botanicals, herbs, oak, honey, some other scent?

Is the aroma strong? Is it faint? Does it evoke memory of other times and places? If it is alcoholic, does the burn of alcohol overwhelm your ability to perceive the scents?

Smell is important as it prepares you for the taste to follow and enhances it.

Until next time, may all your drinks be tasty. Cheers.

The process – Look

Throughout this site and the related book, I use certain terms that should be explained up front so that I don’t have to repeat them for every recipe.

While I’ll serve up a lot of information here, the accompanying book will take all this to the next level. You don’t even have to spend a fortune to get it – you can get it from my author site for a single dollar.

Just click this link and scroll down to A Taste for Drink and click the buy link to get your own ebook version for exactly $1 or Get the paperback from Amazon

___________

I consider tasting, especially for learning purposes, a six step task:

  1. Look – what does the drink look like
  2. Smell – how does it feel in your nose
  3. Taste – the initial flavor on your tongue
  4. Aftertaste – the taste that lingers after you swallow
  5. Notate – take notes so you can remember it in the future
  6. Compare – compare what you experienced to other tastes and sensations

For this post – let’s talk about LOOK.

“Whoa,” I hear you saying. “What’s this about looking? You said this is about learning to taste.”

I know I’ve already mentioned how smell and mouth feel are part of the taste experience but appearance, while not necessarily a component of taste, is important to our understanding of how it may feel once placed into the mouth and how it will combine with other items.

To look, you should pour whatever the liquid you’re about to taste into your sampling glass.

View the liquid by holding the glass at between a 30 and 45 degree angle either backed by a white background or a steady white light, this will give you the best estimate of its color and opacity.

Once the liquid is in the glass, swirl it around. Look at how the liquid clings to the glass. Does it leave residue behind? Does it immediately return to the bottom of the glass when you stop swirling or does it slowly slide down the sides?

When the liquid does not cling to the sides of the glass it is considered to be light bodied.

When the liquid comes down in stripes, or legs, the liquid is considered to be medium bodied.

Finally, if the liquid comes down the sides of the glass slowly as a full sheet this normally identifies a full bodied liquid.

Thicker liquids remain on the tongue and sides of the mouth longer and allow the flavors they carry to be appreciated longer. Very thick liquids can also be perceived as less refreshing and instead as heavy.

Examine the opacity of the liquid. How well does light pass through it when you hold the drink up to a light source. An opaque liquid can create a drink that is dull looking or muddles the colors or the other ingredients.

Until next time, may all your drinks be tasty. Cheers.

Tasting Vessels

Before you actually pour your drink, I would recommend that you get a very specific type of glass to perform your tasting. You could simply pour your liquid into any container to taste but for the most consistent analysis you should always use the same type of container.

My preferred drinking vessel for tasting is made of glass. Glass will not absorb flavors. Glass will not impart any chemicals or feel to the liquid like plastic or metal could. Metal sometimes lends a tinny aftertaste to your drink and plastic can often deaden the flavor or even leach chemicals from the manufacture of the plastic into the taste.

The glass should be smooth sided without ridges or other protrusions to agitate the liquid. The preferred shape is either conical or a wide bowl such as a brandy snifter. The mouth of the glass should be rather wide, sufficiently so to allow you to lower your nose into the glass easily to clearly sample the aroma.

My personal tasting glass holds eight ounces of liquid and is conical in shape, similar to a martini glass without the stem. Some call this style a Viking cup, it is also known as a stemless wine or martini glass. I find the shape easier to hold in my hand than a snifter and the conical walls make it much easier to examine the body of the fluid yet still give the wide shape that facilitates swirling.

Until next time, may all your drinks be tasty. Cheers.

Sampling without breaking the bank

Tasting alcohol can become a very expensive pastime; even a small bottle can run up quite the bill. These days, especially, prices are climbing. For example the last bottle of rum I bought used to cost me $20 USD, it boasted a $42 USD price tag recently.

Rare or high end liquors can eat up your paycheck. There is also the worry that you’ll spend this week’s grocery money on a bottle of Taj Mahal Peacock Feather Liqueur because you read about it in a magazine, take one sip and instantly hate it. What the adventurous taster needs is a way to sample new flavors without breaking the bank.

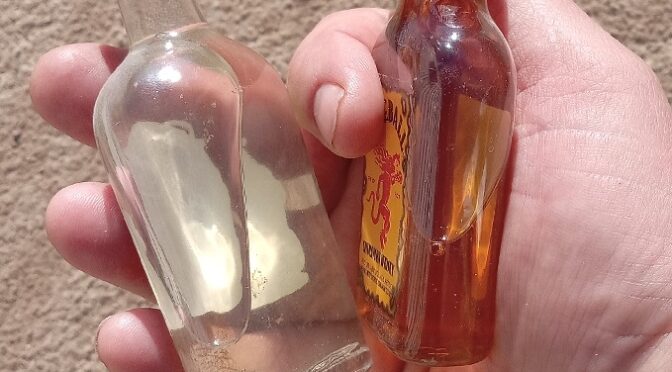
Whether you’re searching for new base alcohols or liqueurs, the small 50ml size, also known as the nip is a godsend to the taster. You can purchase this small amount for a pittance, normally not much more than a dollar, and there is sufficient liquid to provide you with a good tasting experience and even allow you to mix an experimental cocktail.

During your learning phase rely on these ‘tasting size’ bottles to not break the bank or be saddled with a large volume of an alcohol you just cannot stand. It’s also a great way to sample new alcohols you haven’t encountered before.

Nips also make for a perfect travel bar in a suitcase. You can carry an entire bar of alcoholic ingredients and only have to lug around a couple pounds rather than a hand truck overflowing with full size bottles.

Admittedly not every alcohol can be found in the 50ml size but many can. Search on the internet for sample size and you’ll be surprised at the number of companies that offer sample sizes of their products. Even if that special alcohol you want to taste isn’t in the small size, the money you’ve saved by sampling other alcohols this way can be used to purchase a regular sized bottle.

Tasting: Costco’s Kirkland Signature Spiced Rum – an opposing viewpoint.

OK, I’m going to weigh in on a topic I read about on TastingTable.com

They rated Costco alcohols and put the Kirkland Signature Spiced Rum at the bottom of their list.
In some ways they can be justified for their choice BUT, allow me to weigh in.

Spiced rum is produced by macerating natural herbs and spices into white rum. The macerated rum is then aged in oak barrels. Simple and straightforward. I’ve flavored alcohol in this same manner.

Now, as TastingTable correctly points out, “Anything less than this process is a ‘rum with natural flavors,’ a label that retailers are legally required to note on the bottle”

I’ve had the Costco spiced rum in the past from their St. Croix distillery and, frankly, I enjoyed it. The newer rum does have a different flavor profile but contrary to the reviewers at TastingTable.com, I don’t rank it as suitable only for making rum cake.

I always advocate for enjoyment of flavors rather than elitism of only calling things made a certain way as being of value. This was what turned me off from wine tasting (that and I personally find most wine to be sour grape juice – but that’s just MY palate). Many tasters (of spirits or wine) become biased by what they perceive as ‘proper’ and therefore of value.

Now, bear with me – I’m saying NOTHING bad about TastingTable.com, I’m just offering an opposing viewpoint. They presented a very cogent argument for their rankings and I can’t fault their opinion. However, considering that they note that not every alcohol was tasted by them and many of their opinions were formed via gathered commentary in online groups – take their opinion as you will.

To me, the telling comment in their article was, “Either way, Kirkland’s spiced rum lacks the nuance and complexity of quality varieties of rum.”

If you’re a purist, sipping your rum for the experience, they’re probably completely correct as it’s just ‘flavored’ but then again, if you’re reading this site, you are here to learn how to mix flavors to create great drinks. A rum made in the manner of this one is really nothing more than a mixed drink (per se).

Kirkland Spiced Rum is now distilled in Puerto Rico (and boy did I learn to love some Puerto Rican rums on several trips the the island). Yes, it has natural flavors and caramel color. It is rated as 40% ABV (80 proof).

Here’s my take on Kirkland Signature Spiced Rum based on my direct tasting both as a stand alone and in a mix.

LOOK
Nice caramel color but since they use caramel coloring – I’m not going to use that as an indicator of quality.
The rum is thin – as most rums are. Not a lot of body. It quickly returns to the bottom of the glass. But then again just about every spirit does this.

SMELL
There is a hint of alcohol burn in the aroma – but you’d expect that from an 80 proof product.
The main scent I gather upon sampling is a smokey aroma.

TASTE
For a ‘flavored’ rum it’s pretty smooth. I get a somewhat nutty flavor when sipping it straight with a hint of the smokey flavor that the aroma promised.

When mixed in something like coke, the dominant flavor is the vanilla undertones that I got from the aftertaste when sipping it straight.

AFTERTASTE
When tasted straight – there’s a distinct vanilla taste that pops up after swallowing. The alcohol burn cuts in at the same time.

When mixed (such as the rum and coke mentioned before) the aftertaste has more of the vanilla than the nutty flavor. The smokey taste is also more evident than when sipped straight – probably due to the alcohol burn being subsumed in the mixer.

VERDICT
Look, from a purely flavor standpoint, I like this rum. It’s a great mixer for your weekend cocktails. Is it going to win prestigious awards from rum tasting competitions? Of course not. But in tune with the concepts of A Taste for Drink, it is flavorful and will enhance a cocktail it is used in.

So, yes, from a purist standpoint, it is not a ‘great’ rum because it is flavored rather than aged in a barrel with all those lovely ingredients. BUT it has a great taste whether straight up or in a drink so for me, it’s a good rum.

Read the article that started me on this commentary: https://www.tastingtable.com/879602/the-most-popular-kirkland-liquors-at-costco-ranked-worst-to-best/

Until next time, may all your drinks be tasty. Cheers.

Tasting is a learned art

I can hear you saying, “But you still haven’t told me anything. You‘ve just told me to try things and figure it out”

Basically, yes; but remember the old saw: give a man a fish and you feed him for a day, teach him to fish and you feed him for life.

Tasting is something that is a very individual experience. Understanding needs to be on a physical level, knowing how you react to flavors and how they feel. You cannot simply read some descriptions of flavors and lists of what items mix well and expect to be anything other than just another run of the mill mixologist. Thousands of books are available that simply give you this sort of direction—they are a dime a dozen and the skill you gain from them is equally lessened. You must first experience the recipes for yourself and even then, without understanding why the flavors of a recipe work together you‘re just duplicating someone else’s genius.

Treat your efforts to learn about flavors and the combination of those flavors the same as you would treat learning a sport. When a person decides to learn to shoot a bow and arrow they do not just read a book and become a master archer. They spend countless hours drawing the bow and loosing the arrow at a target. The feel of the action becomes ingrained in the muscle—what is known as muscle memory. Taste is the same. If you taste enough things consciously and mindfully, your body and brain learn at an instinctive level what reactions the liquid delivers and you will be able to call upon this stored knowledge when needed.

Just because you’ve tasted something and notated it, you shouldn’t put it behind you, never to be seen again. Revisit things you’ve tasted in the past. Pay attention to them as if new. Reminders like this will keep the flavor memory fresh. Repetition ingrains the memory to allow faster, more accurate recall when presented with the liquid in the future. I can look at a bottle of pineapple juice for example and evoke the flavor in my mind with the same clarity that was there when I first examined the taste because I have consciously tasted it over and over again.

Have you ever read the directions on shampoo? ‘Lather, rinse, repeat.” The same applies to tasting, repeat, repeat, repeat until it becomes so ingrained in your psyche that you can almost taste something just by thinking about it. I’m not saying to mindlessly try things over and over, that is the way to remain thoughtless about your flavors. Focus on how things taste. Really pay attention. Don’t do it all the time because that way leads to madness and could lead you to cease enjoying flavor just for the experience. Every once in a while, stop mindlessly eating or drinking and CHOOSE to focus on the experience. Reload the data into your mind every once in a while to ensure that you will always know what a specific flavor is like.

Anyway, until next time, may all your drinks be tasty. Cheers.
Alcohol Intensity

Controlling alcohol intensity is done by offsetting strong alcohol proof with something of lighter proof. Normally a 1 part strong to 2 parts weak ratio is a good guideline for controlling intensity in your drinks.

Intensity is not just about proof. While it’s simple math to offset a 151 proof alcohol with a 40 proof sometimes drinks of equal strength will exhibit radically different intensities. Take whiskey and rum for example. Rum of 70 proof will often feel less harsh and intense than an equal proof whiskey; this is normally because of the ingredients used in its production. Sugar, the basis for rum, often offsets the intensity of the alcohol on your tongue so that it can feel like a less strong drink even though it is not.

Adding non-alcoholic ingredients will of course lower the alcohol by volume of the final drink. Keep this in mind as you build your beverage. So called tall drinks often use the same level of alcohol as a Highball but use a larger glass and more mixers to lower the alcohol content. If you do not wish the alcoholic punch of your drink to be diminished by your other flavorings and mixers you’ll need to add more alcohol. This is one of the reasons why, when describing recipes, I utilize the nomenclature: part. Instead of calling for a specific volume in ounces which makes scaling drinks difficult, I utilize the term part to allow you to visualize the volume of ingredients in relation to each other regardless of that volume.

Knowing the taste of each alcohol and its relative intensity to the others in your bar is a key component when combining those liquids.

Until next time, may all your drinks be tasty. Cheers.

What is Proof?

I often mention alcohol proof. Alcohol proof is a measure of how much alcohol is contained in a beverage.

The term was originally used in the United Kingdom and was defined as 7/4 times the alcohol by volume (ABV).

The measurement of alcohol content and the statement of this content on the bottle labels of distilled beverages is regulated by law in the United States. The purpose of the regulation is to provide pertinent information to the consumer.
The European Union currently follows recommendations of the International Organization of Legal Metrology (OIML). OIML’s International Recommendation provides standards for measuring alcohol strength by volume and by mass. A preference for one method over the other is not stated in the document, but if alcohol strength by volume is used, it must be expressed as a percentage (%) of total volume, and the water/alcohol mixture must have a temperature of 20°C (68°F) when measurement is done. The document does not address alcohol proof or the labeling of bottles.

Alcohol proof in the United States is defined as twice the percentage of alcohol by volume. Consequently, 100-proof whiskey contains 50% alcohol by volume. Recently the United States has begun to label bottles containing wine and spirits with the percentage of alcohol by volume, instead of proof.

Britain, which used to use the Sikes scale to display proof, now uses the European scale set down by the IOLM. This scale, for all intents and purposes the same as the Gay-Lussac scale previously used by much of mainland Europe, was adopted by all the countries in the European Community in 1980. Using the IOLM scale or the Gay-Lussac scale is essentially the same as measuring alcohol by volume except that the figures are expressed in degrees, not percentages.

Alcohol by volume may be the more accurate and modern method but I’m an old coot and proof is what I learned so I tend to use that as my touchstone so forgive me if I suddenly throw that term around.

It’s good to be forewarned about the differences you’ll encounter when purchasing alcohol so you’re not accidentally purchasing something either too weak or too strong for your needs.

Until next time, may all your drinks be tasty. Cheers.